Learn how to get more out of Beamo with Plans and Packs.
Introduction
You can measure in the 3D Workspace by creating a 2D plane or 3D object.
Note: To switch the measuring unit go to the user profile setting.
Who can use this feature?
| Super Admin | Site Manager | Team Admin | Surveyor | Collaborator | Viewer | |
| Create/edit | ||||||
| Save/delete |
Building 3D objects
By default, measurements are made in reference to the floor. For more advanced measurements, you can build a 3D box or a plane to serve as a reference for measurement.

- Click the [Measure] button in the sidebar.
-
Click the [3D Object]button in the toolbar.
-
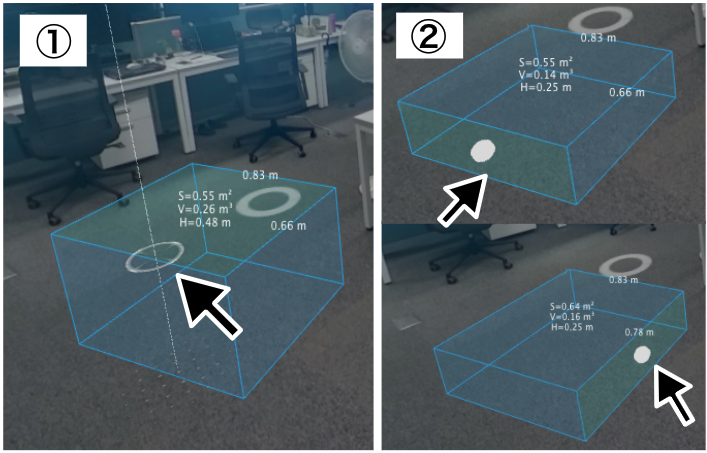
Click on 2 points to create one line, Drag; your mouse to the third point and click to create a 2D box. Drag your pointer upwards or vertically and click at the desired height to create a 3D box. Once built, 3D objects will display the LxWxH dimensions, surface areas (S) and volumes (V).
-
After building your 3D object, click the [Line] button.
-
Select any two points on the 3D object to get measurements.
-
You can save your 3D object by clicking on the [Save] button.
-
To edit the height of the created 3D object, hover the mouse over the object’s top edge and click and drag the white circle that will appear. To edit the size of the 3D object, hover your mouse over any surface of the object and click and drag the white dot that will appear.
- To delete the 3D object you have created, click the [Hand] button, select the object you want to delete, and then click the [Trash bin] at the bottom-center of the screen. If you want to delete all 3D objects at once, click the [Broom] button.